Posts

Gerber Expert 9.6 Now Available for Download

We are proud to announce the availability of Gerber Expert 9.6. This release contains many new features and user-requested enhancements to get the most out of your Gerber Expert software investment.

Gerber Expert 9.6- Key Release Highlights

Polylines & Polygons

  • Add straight, arc, or tangential polylines
  • Add polygon voids to existing polygon by using Circle, Rectangle, Flash, or Draws
  • Add, copy, move, delete, fillet and chamfer polyline vertices. Also, Add Slot and Delete Segment.

New Part Viewing Controls

  • Added “Part Settings” page to the Configuration dialog, the settings control the drawing of part pins and part annotation including:

Design File Locking

  • This new feature creates a lock file when you open a .gedb file. Anyone else that tries to load this file while it is locked will get a Read Only version to prevent overwriting of a file that is in use.

DRC Rule Files

  • New DRC dialog option: save rule files in a dynamic form where abstracted layer types are output instead of absolute layer numbers.

PLUS 21 New Macro Enhancements & a Host of Other Fixes and Enhancements

For More Information

View the Full “What’s New” Document here.

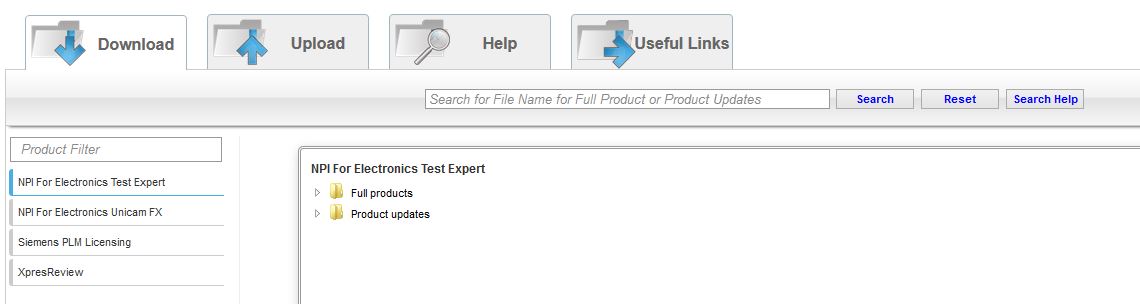
Ready to Download Gerber Expert 9.6?

Follow this link to the extraction package. You will need your Siemens webkey to log in. For information on creating your webkey login, follow Step One in this post here.

If you have any questions or need support with downloading or installation, please don’t hesitate to use our support request form, or call 855-642-2848 Option 2.

Fix for UniDoc & ViewStation Client Install (Version 11)

FYI, a problem with the installer was discovered after the release of UniCam Version 11 that has occurred with some customers, but not all.

Fortunately there is an easy work around. Some customers reported getting a fatal error message when upgrading existing UniDoc and ViewStation client PCs and the installation aborts. This issue does not occur with UniCam clients installs. The work around is to:

  • Browse to the “C:\Users\Public\Documents\UniCam” folder on the client PC you are installing and rename the “UniDocfx.ini” and/or the “ViewStationFX.ini” file(s), adding a “.org” (or similar) extension to the end of the filename.
  • Then run the installer again running the “Repair” option
  • After installation completes, you can delete the newly created default “.ini” files that the installer creates and restore the old ones by removing the “.org” from the end of the filename.

That’s it! If you have any questions, please don’t hesitate to contact our support team at [email protected], or fill out the online support request form.

Thanks for reading.

-Jim

Now Available for Download: UniCam FX 11

We are pleased to announce the availability of UniCam FX Version 11. See below for what’s new, and don’t hesitate to contact us with any questions or support needs.

What’s New in UniCam FX 11

KEY FEATURES

CAD Recognition

An optional feature, the new CAD recognition function automatically detects the CAD file being read into UniCam FX. Users no longer have to know the file source or search to find the exact CAD file type.

XML Reporting

The familiar Crystal Reports are being replaced with cascading style sheets (CSS) and XML data.  This new reporting feature allows users to easily customize reports using standard XML style sheet transformations (XSLT). Transform your XML documents into other XML documents, or other formats such as HTML for webpages, plain text or into XSL formatting objects, which may subsequently be converted to other formats, such as PDF, postscript  and PNG.

Usability Improvements
  • Quickly access current job directory from Quick Menu
  • Insert Classes are stored for easy access throughout UniCam FX
  • Wildcard search capability added to fiducials, form filtering, select parts dialogs
  • “Edit Part” dialog now accessible from the toolbar
  • License Usage Report allows users to see which licenses are in use (and by whom)

NEW MACHINE INTERFACES

CYBEROPTICS SPI

Support for the latest CYBEROPTICS solder paste machines

KME PT200

Creates a recipe to be imported into the Panasonic KME PT200 software

SUPPORT FOR WINDOWS 8

UniCAM FX 11 has been validated on Windows 8 and Windows Server 2012.

LINKS TO DOWNLOAD

Below are the links to download. You will need your active webkey to log in. Also, please note that the Siemens Download Server was updated and may look unfamiliar to you. Read more about the update here.

Client Download

32-bit Server Install

64-bit Server Install

Have questions or need help with installation? Don’t hesitate to reach us using our support form, or by calling 855-642-2848 (option 2).

**UPDATE** If you are running UniDoc and/or ViewStation, please read the special client installation guidelines here.

About UniCam FX: The most commonly used NPI software tool for design and optimization of PCB assembly processes, UniCam FX covers the entire NPI process, from CAD and BOM import through recipe generation, and supports single-platform and mixed vendor lines. Learn more here.


The Siemens Software Download Server Has a New Look!

In an effort to make the software download process for your electronics manufacturing solutions faster & simpler, Siemens PLM Software has changed the look and feel of their Download Center.

Simply look down the left-hand side of your screen, choose your product, and then dive in deeper to get what you need. Or, just type what you’re looking for in the search bar on the top of the screen and it will find it for you.

Screenshot

As always, you will need your webkey to login to the download center. For instruction on creating your webkey, as well as licensing instruction, view our licensing series here.

For step-by-step instruction on the download process, we’ve created a handy guide: Download the document

We hope you find this change helpful to your install and update process. If you have any questions, please don’t hesitate to contact us at 855-642-2848 (option 2 for Support), or by using our handy contact form.


Licensing Tips Part 3: Auto-LogOut Feature

UniCam Security now supports an Auto-Logout feature for both UniCam FX v9.2+ and Test Expert v9.3+. By default, the auto-logout is set to enabled, with a value of 10 minutes. This is a User level setting found in the Properties dialog for each user when in the “Security and Licensing” tool.

Auto-LogOut Feature

If you want to disable all users (or enable all users), you can use the “Secset.exe” utility found in folder where the security software is installed on the license server, (by default “C:\Unicam Security”).  To do this:

1. Open an Administrative Command Prompt on the license server.

2. Navigate to your Unicam Security” folder. CD C:\Unicam Security

3. The possible command lines for the utility are:

SECSET AUTOLOGOUT ON : Enable autologout for all users

SECSET AUTOLOGOUT OFF : Disable autologout for all users

You can also now use this command line:

SECSET AUTOLOGOUT ON 60 : This will enable auto-logout for all users, and set to 60 minutes (or whatever you specify).

If Security & Licensing Admin tool is open when you run the SECSET utility, you will need to close and re-open the Security Admin tool to see the changes.

Have more licensing questions? Be sure to read Part 1 (Installing a New License) and Part 2 (Replacing a License File).

Gerber Expert 9.5 Now Available for Download

We are proud to announce the availability of Gerber Expert 9.5. This release contains many new features and user-requested enhancements to get the most out of your Gerber Expert software investment.

Gerber Expert 9.5- Key Release Highlights

Assembly Reverse Engineering

  • “Part Identification by Package”- Identify components more quickly with predefined packages. Add to the default package definition file to customize your own requirements.
  • “Select Packages”- Run identification on selected parts only.

Convert Customs to Intrinsic

  • Automatically detect Cadence custom thermals as standard intrinsic thermals. Import the negative plane connections as Thermals automatically for improved job processing.

Color Bar

  • Two new right-click options added for easy viewing

Navigator

  • Sort parts by part number in the Navigator

Macro Enhancements

  • DESIGNCOMPARE macro now works with string variables; and also has Help and Keyword within the developer
  • Doubled the number of macro files that can be loaded- up to 256 files

For More Information

View the Full “What’s New” Document here.

Ready to Download Gerber Expert 9.5?

Follow this link to the extraction package. You will need your Siemens webkey to log in. For information on creating your webkey login, follow Step One in this post here.

If you have any questions or need support with downloading or installation, please don’t hesitate to use our support request form, or call 855-642-2848 Option 2.

Licensing Tips Part 2: Replace License File

Did you recently get an updated UniCam license file with new features (or removal of options) or do you need to restore the license after a server crash/repair? If so, read on and follow these steps to replace your existing license file. It’s fairly simple to accomplish and should only take a few minutes before your team is up and running again. 

If you did the initial license install, most of this will be familiar to you.  You can also read Part 1 for a refresher. Please note that you will need your webkey log-in information to update your license.

Steps to Replace UniCam License File

  1. Open the Control Panel from your Start Menu
  2. Open Administrative Tools
  3. Open Services
  4. Find and select the Unicam Security and Licensing Service
  5. Stop the service by clicking the Stop button under the menu bar at the top or by right clicking on the service listing and selecting Stop.
  6. Go to the Siemens GTAC website (http://support.industrysoftware.automation.siemens.com)
    1. Log in using your Webkey information
    2. Licensing Management->
    3. Current License->
    4. Enter your Sold-To ID (if requested)
    5. Click Passwords and License File
    6. Select “Unicam products” from the Product drop list field and click Continue
    7. Upload your Challenge.nlc file when prompted. Locate your “Challenge.nlc” file in the folder where you installed the license server, (by default “C:\Unicam Security”).
    8. You are prompted to download a file namedlicense.nlf”. Download and save this file in the folder where you installed the security and licensing server, (by default “C:\Unicam Security”). Overwrite existing license file if prompted.
    9. Start the Unicam Security and Licensing server. You can do this by simply rebooting the PC/Server, but a reboot is not required. You can also:
      1. Open Control Panel -> Administrative Tools -> Services
      2. Locate and start “Unicam Security and Licensing server

Do a Quick Test

For UniCam FX

  1. Open a UniCam FX client that is pointed to your security server
  2. If you are launching a newly installed client for the first time you may receive an error that no security server could be found. If this happens, close the error message and click on the Options menu in Unicam and select Security Server IP Address and then enter the IP address or hostname for the server where you installed the licensing. Click OK and close Unicam, then re-open UniCam.

For Test Expert

  1. Open a Test Expert client that is pointed to your security server
  2. If you are launching a newly installed client for the first time you may receive an error that the Server did not respond. If this happens, close the error message and click YES on the next Warning message box. A message box will appear asking you to enter the Security Server IP Address or hostname for the server where you installed the licensing. Enter the address or hostname and click OK. Close and restart Test Expert.

Congratulations! You’ve successfully installed your replacement UniCam license file.

Congratulations! You’ve successfully installed your replacement UniCam license file.

We hope this was helpful- if you need further assistance, please don’t hesitate to give us a call at 855-642-2848 Option 2, or use our new support form for prompt assistance.

Thanks for reading,

Dave

Licensing Tips Part 1: Installing a New License

Licensing is one of the most common support topics to come through our support line.  Now that we have a vehicle for sharing information with the world, I have put together a 4-part series on common licensing questions and their answers. This article is the first in the series, and will guide you through your initial licensing experience.

Step 1: Create a Siemens Webkey Account

In order to access our web tools and services available at Siemens PLM Software, you will need to create a WEBKEY account. A WebKey account allows you to control the username and password used to associate you with your company. Through this authentication scheme, we can control access to services, information and also guarantee the privacy of all customer data.

Let’s get started:

  1. Follow this link to create your WebKey account
  2. Enter your Sold-to ID. Your Sold-to ID is directly under the Sold-to information on your shipping order. (You may have also received an email from your CSR with an attached file containing this info.)
  3. Enter your WebKey Access Code (WAC). The Webkey Access Code can be found on the upper right corner of your shipping order that came with your CD. (You may have also received an email from your CSR with an attached file containing this info.)
  4. Fill in required info and create a User Name and Password
  5. This will trigger an activation email from Siemens PLM Software- once you have received the email and activated your webkey, follow the steps below.

Note: You must have a WebKey to log onto the Siemens UGS Support web site. If you do not have a WebKey and have trouble using the process defined above for creating one, please contact the Global Technical Access Center (GTAC) at 800-955-0000 or 714-952-5444 (North America or South America) or your local support office (all other world locations).

Step 2: Install UniCam Licensing Tools

  1. From the UniCam FX CD setup menu install Microsoft .NET 3.5 SP1.
  2. From the UniCam FX CD launch the Setup.exe then select “Security & Licensing” option from the Setup Wizard menu and click Install.
    1. Accept the default settings and click to “Agree” to the licensing terms.
  3. When the installation is complete it will create a file named “challenge.nlc”. This file is saved in the folder where you installed the license server, “C:\Unicam Security” by default. (Make note of this location for step 11 below.)
  4. Browse to the Siemens Support web site at http://support.industrysoftware.automation.siemens.com
  5. Log in using the Webkey information you just created
  6. License Management->
  7. Licenses->
  8. Enter your Sold-To ID (if requested)
  9. Click Passwords and License File
  10. Select “Unicam products” from the Product drop list field and click Continue
  11. Upload your Challenge.nlc file when prompted. Locate your “Challenge.nlc” file in the folder where you installed the license server, (by default “C:\Unicam Security”).
  12. You are prompted to download a file namedlicense.nlf”. Download and save this file in the folder where you installed the security and licensing server, (by default “C:\Unicam Security”). Overwrite existing license file if prompted.
  13. Start the Unicam Security and Licensing server. You can do this by simply rebooting the PC/Server, but a reboot is not required. You can also:
    1. Open Control Panel -> Administrative Tools -> Services
    2. Locate and start “Unicam Security and Licensing server

 Licensing is Now Installed and Ready for Test

For UniCam

  1. Open a UniCam FX client that is pointed to your security server
  2. If you are launching a newly installed client for the first time you may receive an error that no security server could be found. If this happens, close the error message and click on the Options menu in Unicam and select Security Server IP Address and then enter the IP address or hostname for the server where you installed the licensing. Click OK and close Unicam, then re-open UniCam again.

For Test Expert

  1. Open a Test Expert client that is pointed to your security server
  2. If you are launching a newly installed client for the first time you may receive an error that the Server did not respond. If this happens, close the error message and click YES on the next Warning message box. A message box will appear asking you to enter the Security Server IP Address or hostname for the server where you installed the licensing. Enter the address or hostname and click OK. Close and restart Test Expert.

Congratulations! You have successfully installed your UniCam License server and your users can now begin to use the software. If you have any questions, please don’t hesitate to contact us using our support form or by calling 855-64ACUITY, Option 2.

In Part 2, we will cover “Replacing an Existing License File”. Read Part 2 HERE.

Thanks for reading,

-Dave